After creating your site, you need to configure how Sitepins interacts with your project’s content, media, and configuration files.
Configuration Overview
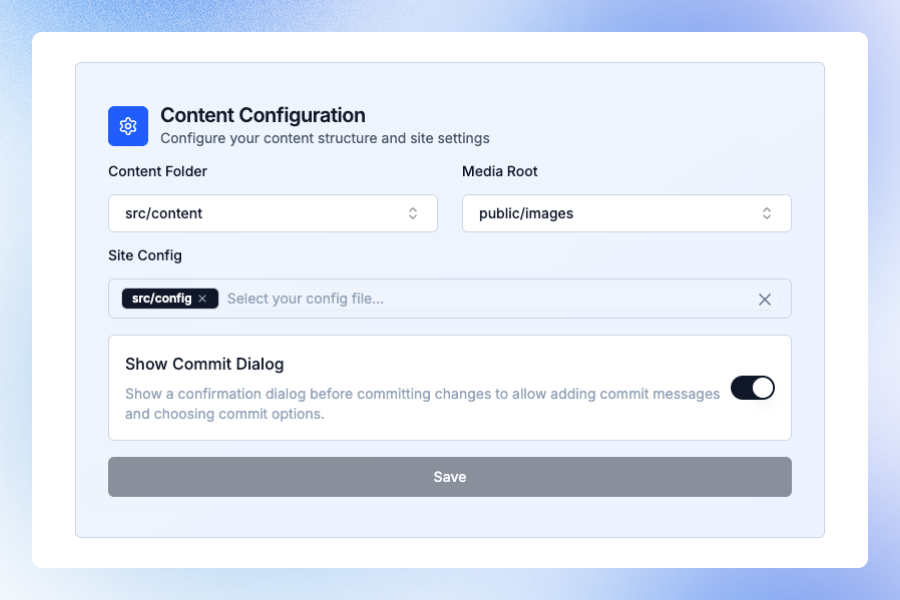
The configuration process is organized into four main steps:
- Content Folder - Where your markdown/content files are stored
- Media Settings - Where your images and media assets are managed
- Code Folder - Where your layouts and components are stored (optional)
- Site Configs - Your site configuration files (optional)
Sitepins automatically detects your framework (Next.js, Astro, or Hugo) and provides intelligent folder suggestions based on common conventions.
Step 1: Content Folder
The Content Folder is the parent directory containing all your site’s content files (e.g., Markdown, MDX).
Framework-Specific Suggestions
- Next.js/Astro:
src/content - Hugo:
content
How to Configure
- Click the dropdown to see all available folders in your repository
- Select the folder that contains your content files
- Sitepins will use this as the base for content management
It’s crucial to select the correct folder. If your content folder doesn’t match your actual file structure, Sitepins won’t be able to map your content correctly.
Step 2: Media Settings
Configure where your media assets are stored and how they’re publicly accessible.
Media Root
The Media Root is the directory where Sitepins will upload and manage your media files.
Framework-Specific Suggestions:
- Next.js/Astro:
public/images - Hugo:
assets/imagesorstatic/images
Media Public
The Media Public folder defines how your site references images publicly in the browser.
Framework-Specific Suggestions:
- Next.js/Astro:
public - Hugo:
assetsorstatic
Auto-Selection: When you select a Media Root folder, Sitepins automatically suggests the parent folder as the Media Public path. For example, if you select public/images, it will auto-select public as the Media Public folder.
Understanding Media Root vs Media Public
-
Media Root: The actual directory in your repository where files are stored
- Example:
public/images/blog - Used by the CMS to organize and manage uploads
- Example:
-
Media Public: The public URL path for accessing images
- Example:
public - Ensures correct URLs are generated for your static site generator
- Example:
Step 3: Code Folder (Optional)
The Code Folder is where your layouts, components, or templates are stored.
Framework-Specific Suggestions:
- Next.js/Astro:
src/layouts - Hugo:
themes/layouts
This is optional but useful if you want to manage code files through Sitepins.
Step 4: Site Configs (Optional)
Select configuration files that control your site’s behavior, theme, navigation, or metadata.
Framework-Specific Suggestions:
- Next.js/Astro:
src/config - Hugo:
config,hugo.json,data
What to Include
You can select:
- Individual config files (e.g.,
theme.json,menu.json,config.json) - Entire folders containing config files
- Multiple files or folders
Sitepins will make these files easily accessible for editing through the CMS interface.
Commit Configuration
Control how commit messages are handled when you save changes.
Custom Commit Messages

Toggle Option: Enable or disable custom commit messages
- Enabled: You’ll see a dialog before each commit where you can write your own commit message
- Disabled: Sitepins automatically generates commit messages for you
When to Enable:
- You want full control over Git history
- You need to follow specific commit message conventions
- You’re working in a team with strict Git workflows
When to Disable:
- You prefer a streamlined, quick-save workflow
- You trust Sitepins to generate meaningful commit messages
- You’re the sole content editor
Saving Your Configuration
After completing all steps:
- Review your selections
- Click “Finish Setup” (for first-time setup) or “Save” (for updates)
- Sitepins will create a
.sitepins/config.jsonfile in your repository
What Happens Next
Once saved:
- Sitepins scans and maps your content files automatically
- You’ll see a folder structure in the left sidebar
- The visual editor and Markdown view become available
- The Media Library is ready for managing assets
All changes are committed directly to your Git repository.
Updating Configuration Later
You can update your configuration anytime:
- Go to your project settings
- Modify any of the folder paths or settings
- Click “Save” to apply changes
Changing the Content Folder or Media Root after you’ve started editing may affect how Sitepins maps your existing content. Make sure to update these carefully.
Need Help?
If you need assistance with configuration:
- Check our Discord Community
- Contact Support
- Review framework-specific documentation for folder structure guidance