Content schemas define the structure and fields for your content files, making it easy to create consistent, well-structured content across your site. With schemas, you can define templates that automatically populate new files with the correct frontmatter fields and default values.
What are Schemas?
A schema is a template that defines:
- The fields that should appear in your content files
- The type of each field (text, number, date, boolean, etc.)
- Default values for fields
- Whether fields are required or optional
- Field labels and descriptions
When you create a new content file in a folder with a schema, Sitepins automatically generates the file with all the defined fields, saving you time and ensuring consistency.
Which Folders Need a Schema
Schemas are templates for new files, so they’re only worth creating for folders that keep growing.
Create a schema for collection folders — anywhere editors regularly add new entries:
blog/- new postsauthors/- new author profilespages/- new standalone pagesproducts/,docs/, and similar
Skip one-off pages. Folders holding a single page — typically homepage/, about/, contact/ — don’t need one. Nobody creates a second homepage; editors just open the existing file and change it. A schema there only adds clutter to Schema Management.
The quick test: would you ever add a new file to this folder? If the folder contains just one landing file (_index.md or -index.md) and nothing else, it’s a one-off page — skip the schema.
Reusable section files (e.g. sections/call-to-action.md) sit in between. They’re usually a fixed set tied to specific layouts, so most sites don’t need a schema for them — add one only if editors genuinely create new sections.
Creating a Schema
From a Content Folder
- Navigate to any content folder in your project
- Click “Create Schema To Add New File” button
- In the schema dialog, select an existing file to use as a template
- Sitepins will automatically analyze the file and extract its frontmatter fields
Schema Generation Process
When you select a file, Sitepins:
- Parses the frontmatter (YAML or TOML)
- Detects field types automatically
- Extracts default values
- Creates a schema template you can customize
Schemas are stored in the .sitepins/schema folder in your repository as JSON files.
Schema Fields
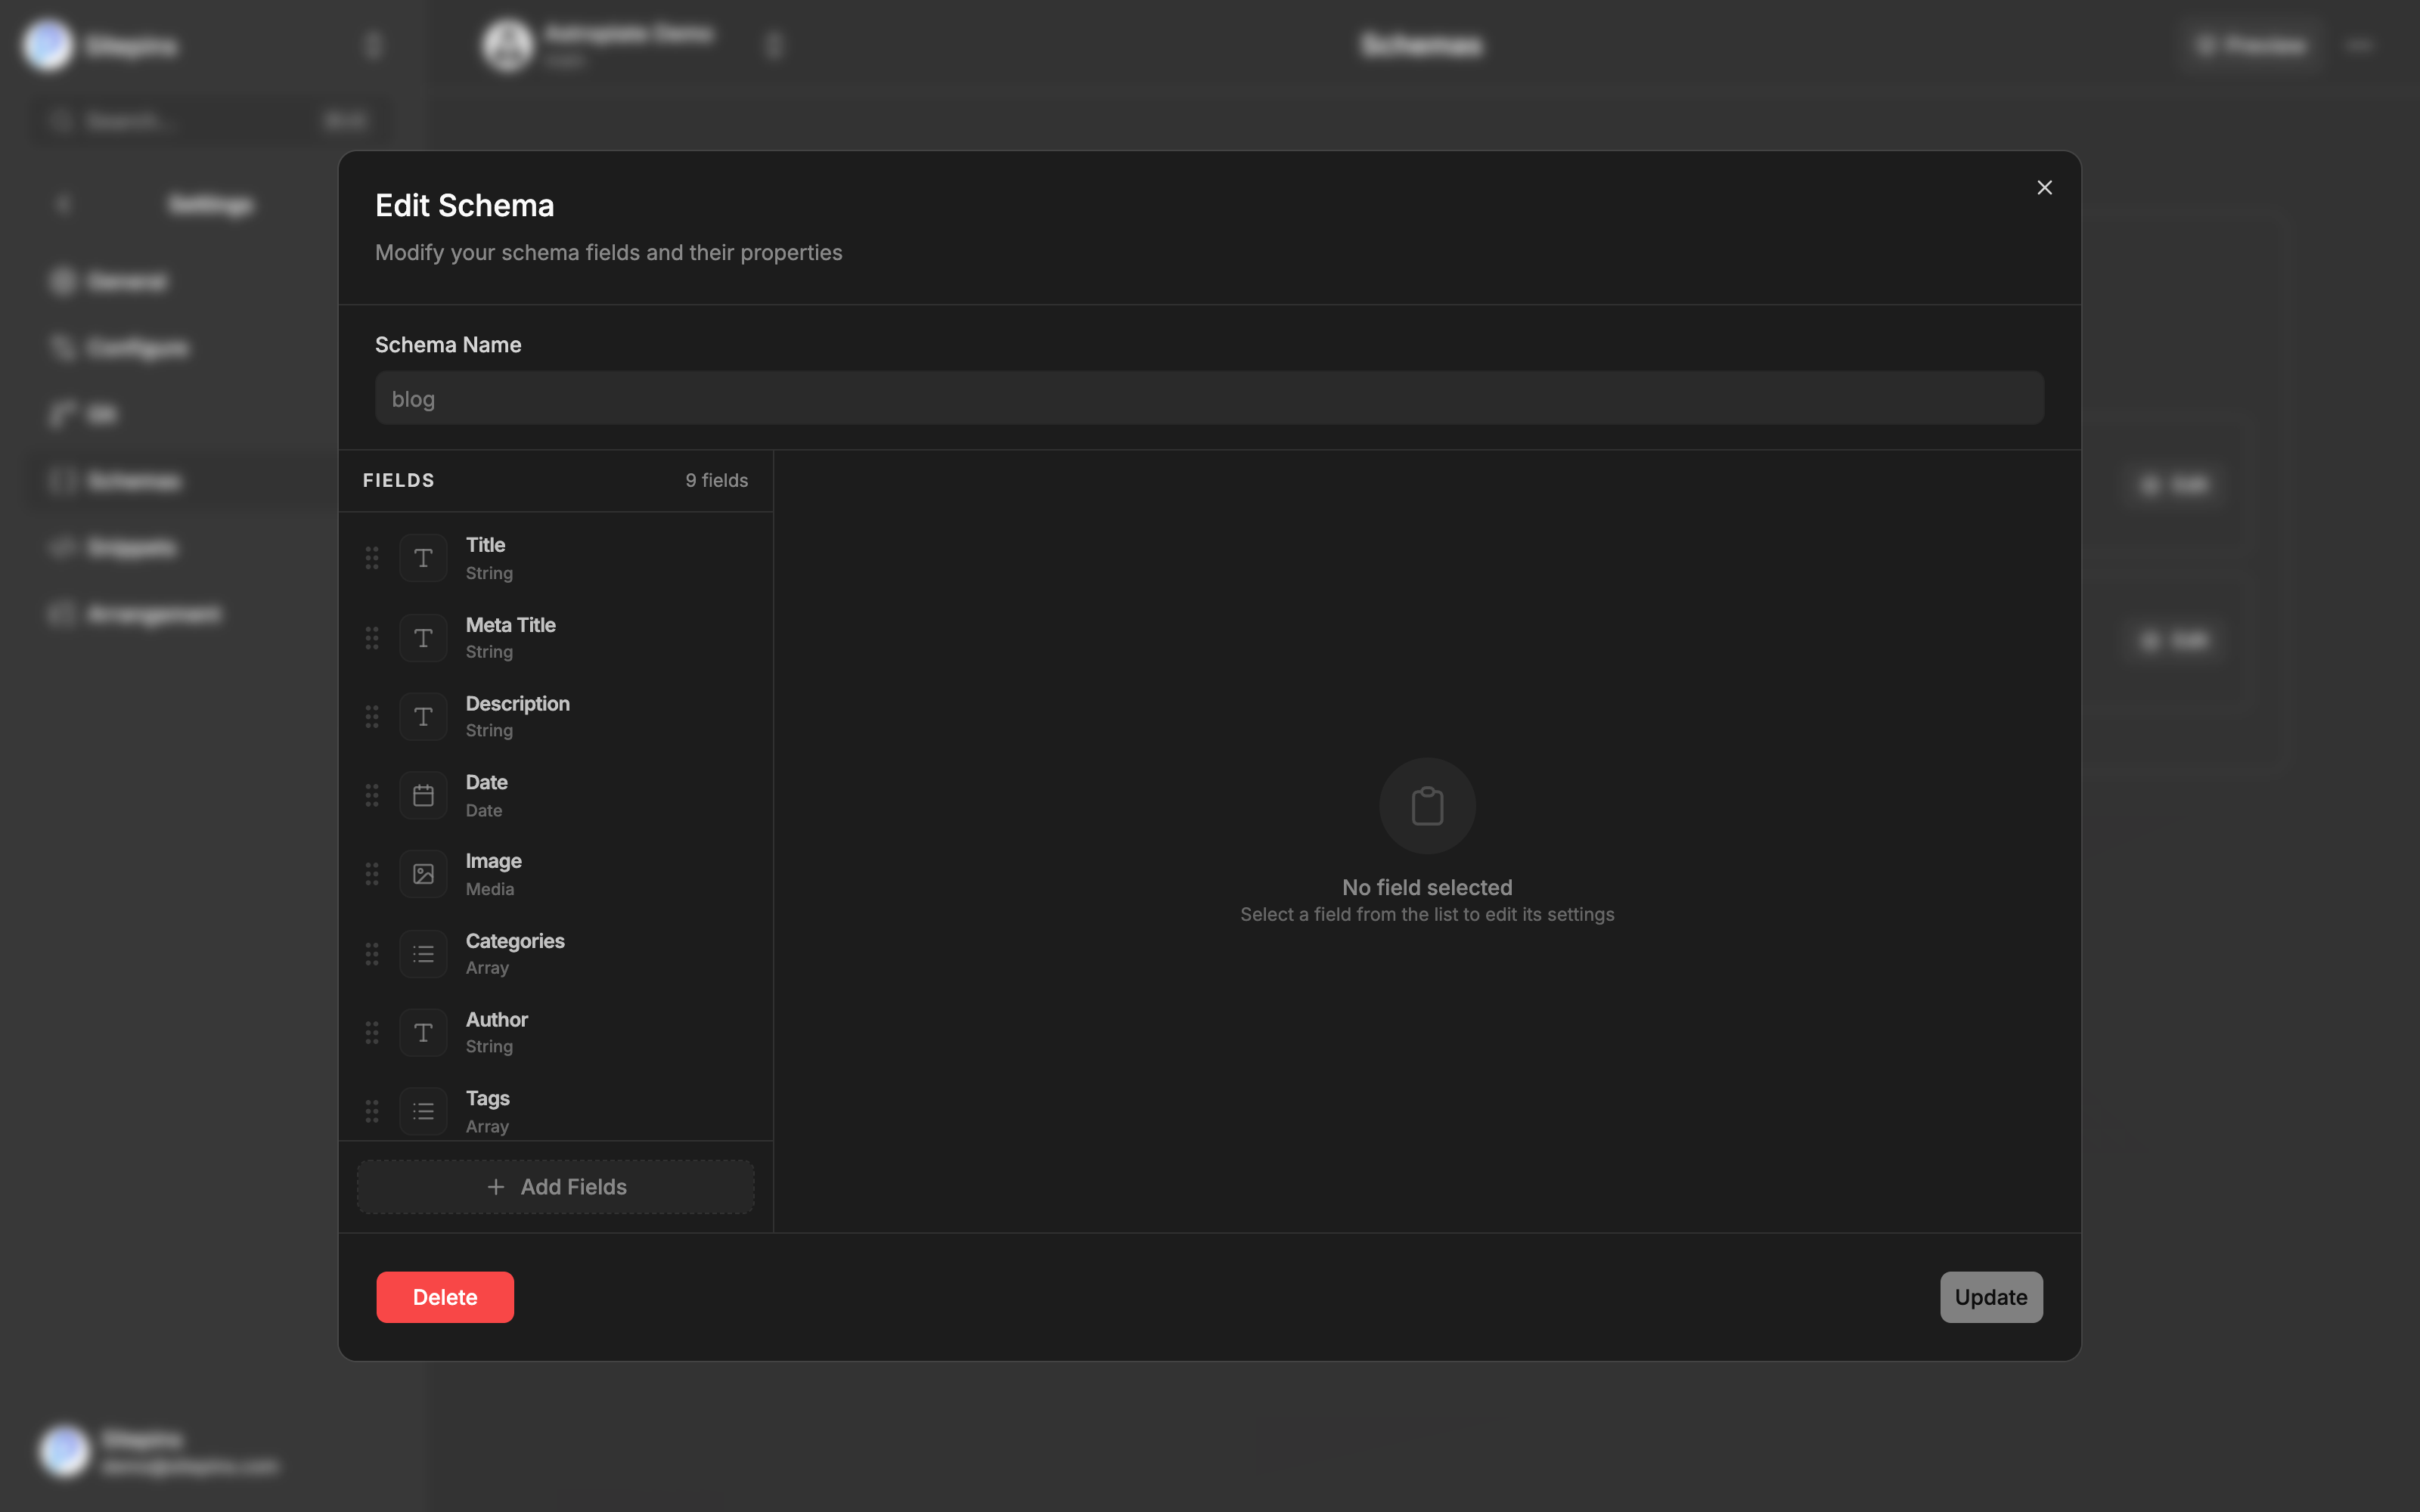
Each field in your schema can have the following properties:
Field Name
The key used in the frontmatter (e.g., title, date, author)
Field Type
When adding a field, you can choose from these types (the value in brackets is what’s written to the schema JSON):
- String (
string) - Text input. Use it for all text, including long-form fields likedescription. - Number (
number) - Numeric values - Boolean (
boolean) - True/false toggle - Date (
Date) - Date picker - Media (
media) - Single image/file picker - Gallery (
gallery) - Multiple media items - Array (
Array) - List of values. In the JSON an array also carries asubTypeof either"string"(a plain list) or"object"(a repeatable group, which then needs its ownfields). - Object (
object) - Nested fields
These eight are the complete list. There’s one extra type, color, which Sitepins assigns automatically when a value looks like a color (e.g. #ff0000) — it isn’t in the menu.
Type names are case-sensitive in the JSON. Note the capitalised Date and Array versus lowercase string, number, boolean, media, gallery, and object.
There is no separate multi-line or rich-text type — long-form values such as description use string.
Default Value
The value automatically populated when creating new content
Required
Whether the field must be filled in before saving. Required fields are validated at commit time — an empty one blocks the save, including fields nested inside objects and arrays.
Show / Hide
Whether the field is visible to editors. Hiding a field keeps it in the schema (and in new files) but removes it from the editing form — useful for values that should exist but never be hand-edited.
Label
Display name shown in the editor
Description
Help text explaining what the field is for
Date Behavior
Date fields have one extra setting that controls what new files get:
- Fixed Date — always the specific date you pick
- Current Date (Live) — the date the file is created
- Empty — left blank for the editor to fill in
Most date fields on blog posts want Current Date (Live).
Reordering Fields
Drag any field in the schema editor to change its position. The order here is the order editors see in the frontmatter form, so put the fields people actually fill in at the top.
Adding Fields to a Schema
After creating a schema, you can add more fields:
- Click the “Add Field” button at the bottom of the schema editor
- Fill in the field properties:
- Name - The field key
- Type - Select from available field types
- Label - Display name
- Default Value - Optional default
- Required - Toggle if mandatory
- Click “Add” to save the field
Field names must be unique within a schema. Sitepins will show an error if you try to add a duplicate field name.
Creating a Dropdown Field
Instead of letting editors type a value freely, you can offer a fixed list to choose from — an author, a category, a status.
A dropdown isn’t a separate field type. It’s an input style available on:
- String fields → single-select dropdown
- Array fields holding strings → multi-select dropdown
Steps
- Add or edit a field and set its Type to
String(orArrayfor multi-select) - An Input Style menu appears — change it from Standard Textbox to Dropdown Selection (on an
Arrayfield these read Standard Table and Multi-select Dropdown) - Under Dropdown Configuration, pick a Source for the options
- Fill in the settings for that source (below), then save the field
If the Input Style menu doesn’t appear, the field type isn’t compatible. Only String and string-based Array fields can become dropdowns.
Option Sources
Static Options
A fixed list you type in yourself. Best for short, stable choices like a status or a layout name.
Add each option value one at a time.
Files from Folder
Generates one option per file in a folder — ideal for referencing other content, such as picking an author from authors/.
- Folder Path - The folder to read, e.g.
src/content/authors - Display Field - Which frontmatter key to show as the option label (e.g.
title). Leave it as the default to use the filename;slugis also available. - Include / Exclude Pattern - Optional glob filters, e.g. include
*.mdand exclude_index.md
Data from File
Reads options out of a single JSON, YAML, or TOML file — useful when you already keep a taxonomy list in your site config.
- File Path - The data file to read, e.g.
src/config/taxonomy.json - Data Key - Which key inside that file holds the list, e.g.
categories. Leave it at the default to use the entire file or array.
Example
A multi-select category picker sourced from a config file looks like this in the schema JSON:
{
  "name": "categories",
  "label": "Categories",
  "type": "Array",
  "subType": "string",
  "value": [],
  "isDropdown": true,
  "referenceType": "file",
  "referencePath": "src/config/taxonomy.json",
  "referenceField": "categories"
}
And a single-select author picker sourced from a content folder:
{
  "name": "author",
  "label": "Author",
  "type": "string",
  "value": "",
  "isDropdown": true,
  "referenceType": "folder",
  "referencePath": "src/content/authors",
  "referenceInclude": "*.md",
  "referenceExclude": "_index.md",
  "referenceField": "title"
}
Editing Fields
To modify an existing field:
- Find the field in the schema editor
- Click to expand the field settings
- Update any properties (type, label, default value, etc.)
- Changes are saved when you update the schema
Deleting Fields
To remove a field from a schema:
- Find the field in the schema editor
- Click the delete icon (trash can)
- The field will be removed from the template
Deleting a field from the schema doesn’t affect existing content files. It only affects new files created using the schema.
How Schemas Are Matched To Folders
A schema is linked to a content folder by its filename, not by anything inside the file. The name is the folder’s path with your configured content folder removed from the front:
schema name = <content folder path>  −  <configured content folder>
schema file = .sitepins/schema/<schema name>.json
For example, with the content folder set to src/content:
| Content folder | Schema name | Schema file |
|---|---|---|
src/content/blog | blog | .sitepins/schema/blog.json |
src/content/authors | authors | .sitepins/schema/authors.json |
src/content/blog/2024 | blog/2024 | .sitepins/schema/blog/2024.json |
Note that nested folders keep their slashes, so their schemas live in matching subfolders.
If a schema filename doesn’t match this rule, it is silently ignored — no error is shown, the fields just never appear. If a schema isn’t being applied, check its filename first.
Schema Inheritance
You don’t need a schema for every nested folder. When a folder has no schema of its own, Sitepins falls back to the closest one above it:
.sitepins/schema/blog.json  ← Schema for the blog section

src/content/
  blog/
    2024/
      post-1.md  ← Uses blog schema
      post-2.md  ← Uses blog schema
This lets you define a schema once per content section, keeps nested folders consistent, and avoids duplication.
Hugo and Multilingual Sites
Hugo keeps content inside a language folder, such as content/english/. Because the schema name is whatever follows your content folder setting, this choice matters:
- If your content folder is set to the language folder (e.g.
exampleSite/content/english), schema names stay simple:blog.json,authors.json. This is the recommended setup. - If it’s set to the parent (e.g.
exampleSite/content), the language becomes part of the name, so the blog schema must beenglish/blog.json. A plainblog.jsonwill never be found.
Managing Schemas
Schema Management Page
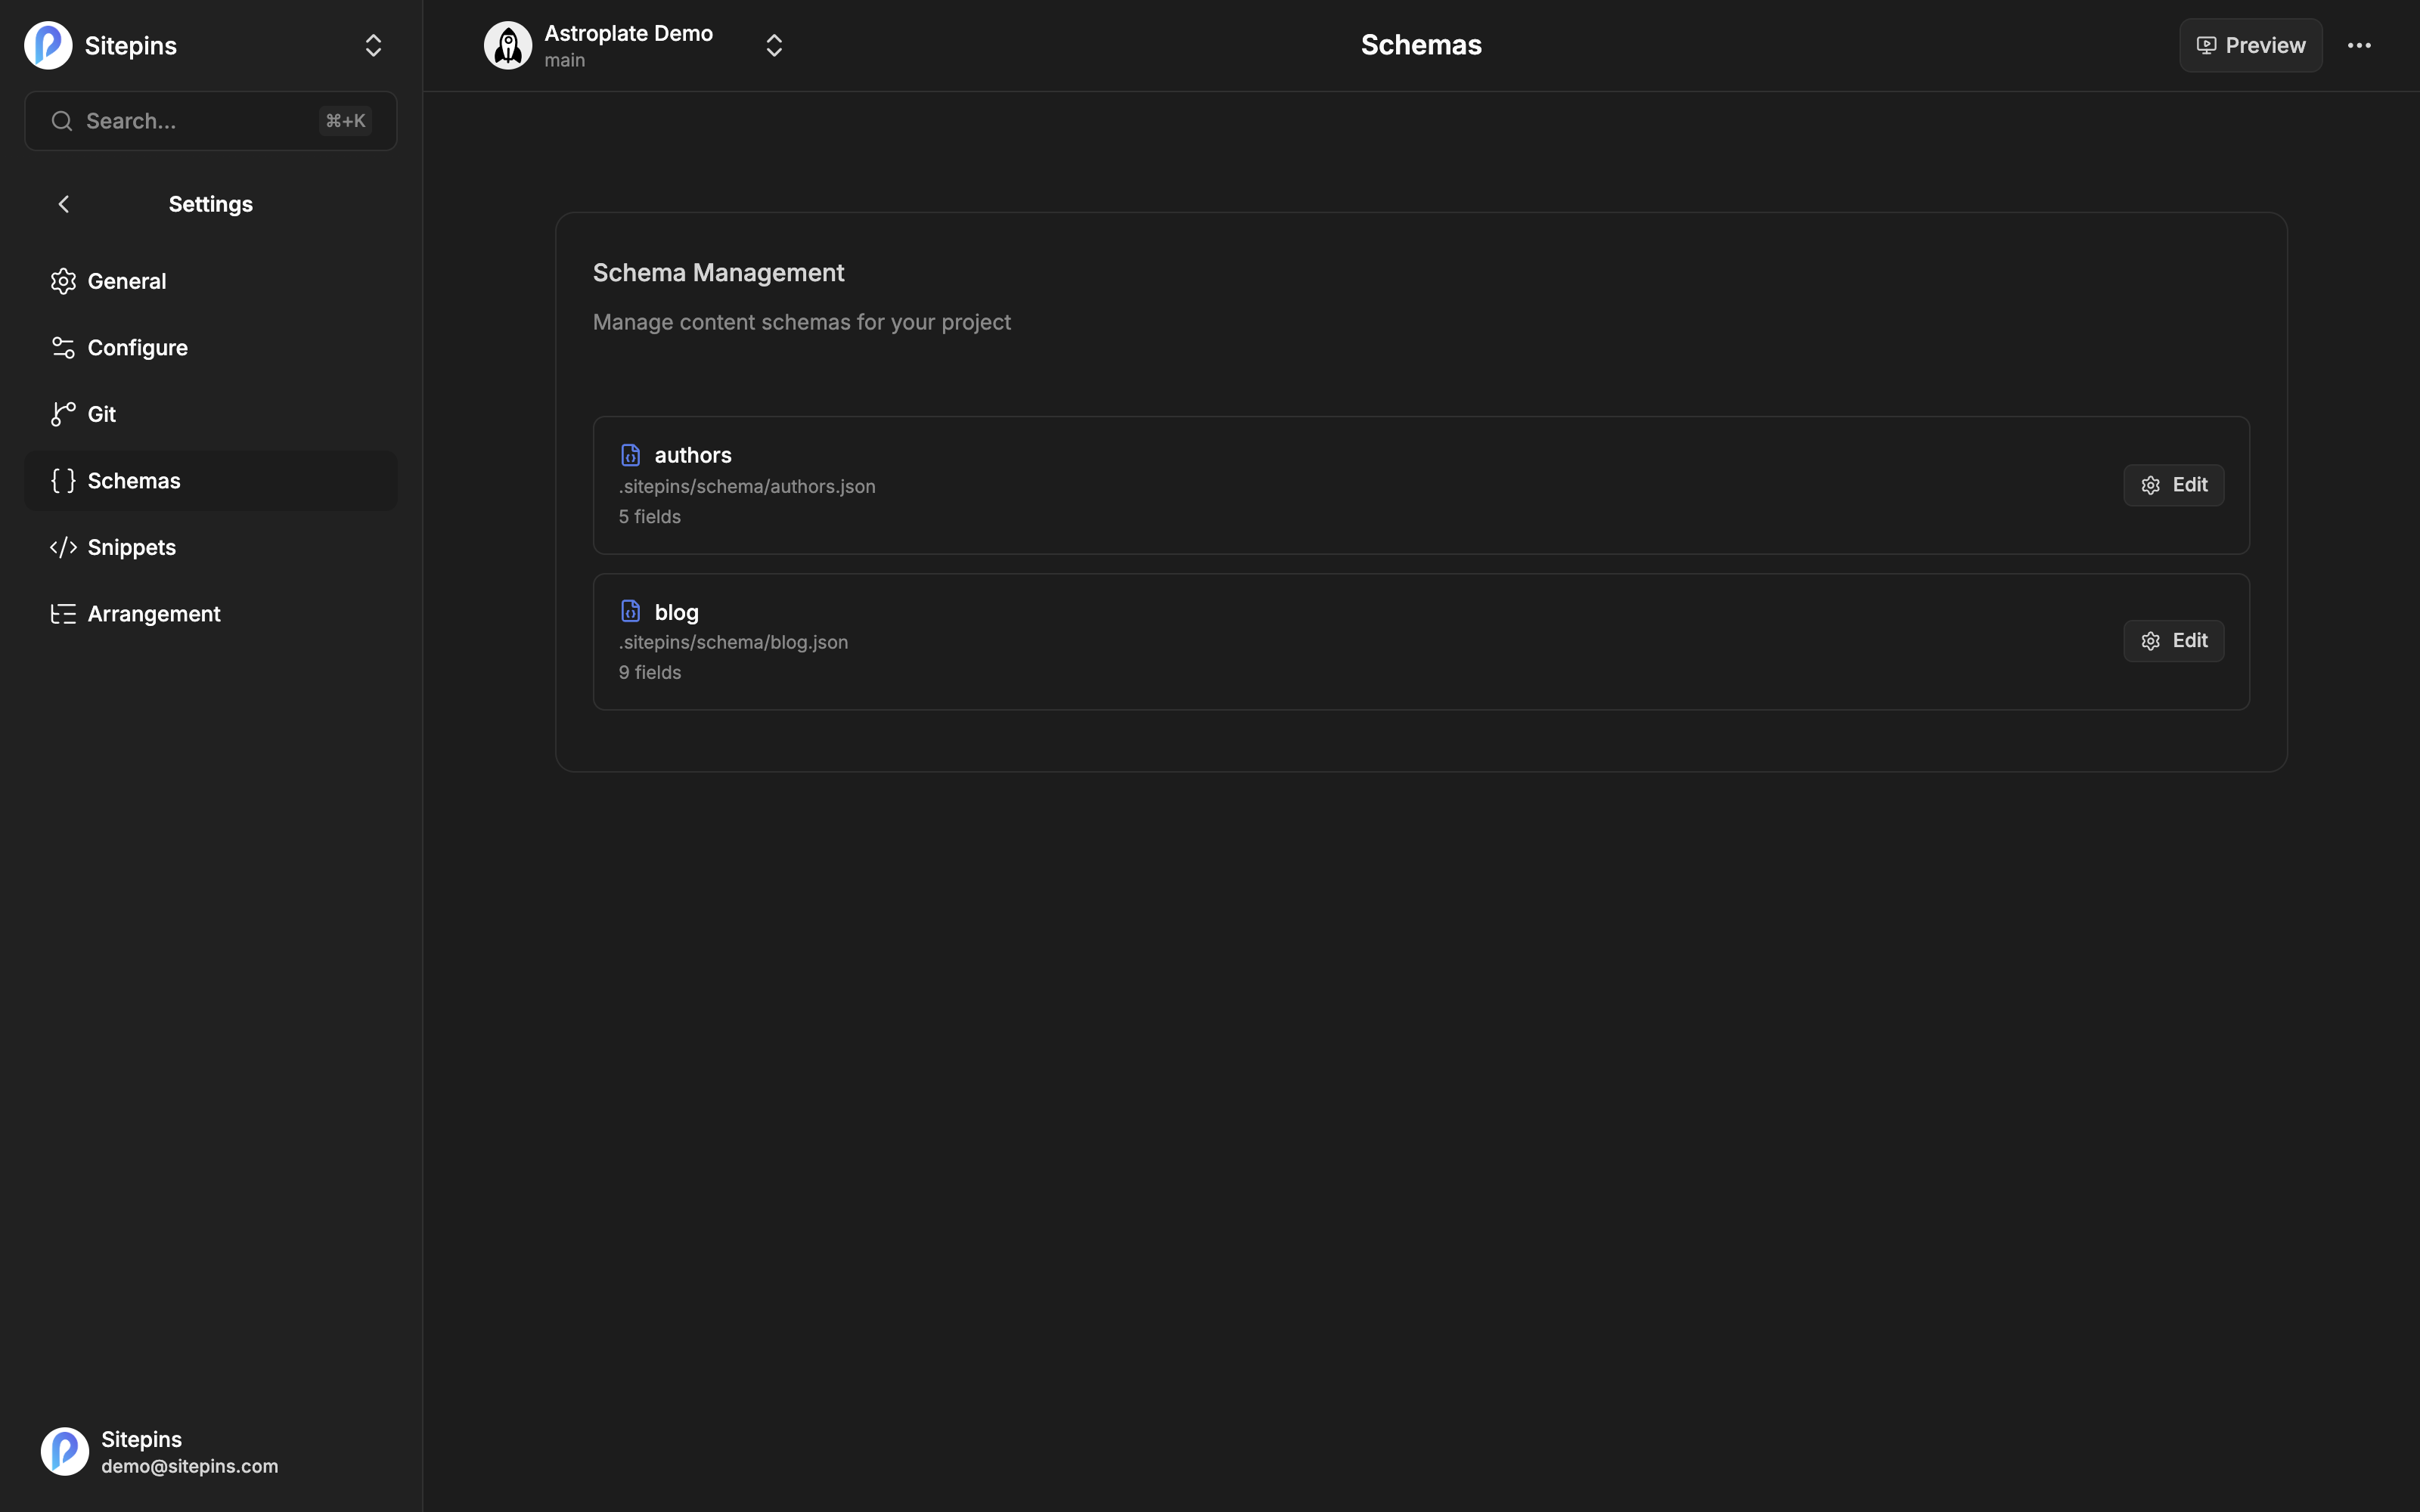
Access all your schemas from the project settings:
- Go to your project dashboard
- Navigate to Schema Management
- View all schemas in your project
Schema List View
The schema management page shows:
- Schema Name - The display name
- File Path - Location in
.sitepins/schema/ - Field Count - Number of fields in the schema
Editing Schemas
From the schema list:
- Click “Edit Schema” on any schema
- Modify fields, add new ones, or delete existing fields
- Click “Update Schema” to save changes
Deleting Schemas
To remove a schema:
- Open the schema in edit mode
- Click “Delete Schema” button
- Confirm the deletion
Deleting a schema is permanent and cannot be undone. However, it won’t affect existing content files created with that schema.
File Types and Frontmatter Formats
Schemas support different file types and frontmatter formats:
Supported File Types
- Markdown (
.md) - MDX (
.mdx)
Supported Frontmatter Formats
- YAML - Uses
---delimiters - TOML - Uses
+++delimiters
Sitepins automatically detects the format from your template file and uses it for all new files created with that schema.
Best Practices
1. Start with an Existing File
Use a well-structured existing file as your schema template. This ensures you capture all necessary fields and their correct types.
2. Use Descriptive Labels
Give fields clear, descriptive labels so content editors understand what each field is for.
3. Set Sensible Defaults
Provide default values for fields that commonly have the same value (e.g., draft: true for new posts).
4. Mark Required Fields
Use the required flag for essential fields like title or date to prevent incomplete content.
5. Organize with Schemas
Create separate schemas for different content types (blog posts, documentation pages, product pages, etc.).
6. Only Create Schemas for Growing Folders
Schemas exist to speed up creating new files, so they only pay off where new files actually get created — blog, authors, pages, products. Skip one-off pages like homepage, about, or contact: those files are written once and then edited in place, so a schema adds clutter without helping anyone. See Which Folders Need a Schema.
7. Use Schema Inheritance
For nested folder structures, create schemas at the top level and let subfolders inherit them.
Example Schema
Here’s what a blog post schema might look like:
{
  "name": "blog",
  "file": "src/content/blog/example-post.md",
  "fileType": "md",
  "fmType": "yaml",
  "template": [
    {
      "name": "title",
      "label": "Post Title",
      "type": "string",
      "value": "",
      "defaultValue": "",
      "isRequired": true
    },
    {
      "name": "date",
      "label": "Publish Date",
      "type": "Date",
      "value": "",
      "defaultValue": "",
      "isRequired": true,
      "alwaysUseCurrentDate": false
    },
    {
      "name": "image",
      "label": "Cover Image",
      "type": "media",
      "value": "",
      "defaultValue": ""
    },
    {
      "name": "author",
      "label": "Author Name",
      "type": "string",
      "value": "",
      "defaultValue": "John Doe"
    },
    {
      "name": "draft",
      "label": "Draft Status",
      "type": "boolean",
      "value": false,
      "defaultValue": "true"
    },
    {
      "name": "tags",
      "label": "Tags",
      "type": "Array",
      "value": [],
      "defaultValue": ""
    }
  ]
}
Each field carries both a value (what gets written into a new file) and a defaultValue. Use isRequired to make a field mandatory and isIgnored to hide it from the editor. Date fields also accept alwaysUseCurrentDate, which stamps today’s date every time the file is saved.
For a repeatable group, give an Array field its own fields array:
{
  "name": "social",
  "label": "Social",
  "type": "Array",
  "subType": "object",
  "value": [],
  "fields": [
    { "name": "icon", "label": "Icon", "type": "media", "value": "" },
    { "name": "link", "label": "Link", "type": "string", "value": "" }
  ]
}
Troubleshooting
Schema Not Appearing
If your schema isn’t being used:
- Check that the schema file exists in
.sitepins/schema/ - Verify the filename follows the matching rule above — this is the most common cause. Take the folder path, remove your configured content folder, and that’s the filename (e.g. content folder
src/content+ foldersrc/content/blog→blog.json) - On Hugo, remember the language folder counts unless your content folder points at it
- Try refreshing the page
Fields Not Showing Correctly
If fields aren’t displaying as expected:
- Verify the field type is correct
- Check for typos in field names
- Ensure the frontmatter format matches the schema
Can’t Create New Files
If you can’t create new files in a folder:
- Make sure a schema exists for that folder or a parent folder
- Check that the schema has valid fields
- Verify you have write access to the repository
Schema Mismatch Detected
When a file’s frontmatter doesn’t line up with its folder’s schema — extra fields, missing fields, a different type — the editor shows a Schema Mismatch Detected notice with two options:
- Show Actual Fields — edit exactly what’s in the file. Use this when the file is right and the schema is out of date.
- Show Schema Fields — edit against the schema, with missing fields added blank. Use this when you’re bringing an older file up to the current structure.
Neither option rewrites the file on its own. The file changes only when you save.
This usually means the schema was edited after the file was created, or the file predates the schema. Fixing it is a choice about which one is authoritative — Sitepins deliberately doesn’t guess.
Need Help?
- Join our Discord Community
- Contact Support
- Check the GitHub Discussions